How to clear the cache in WordPress: every plugin and host, step by step
- In most plugins the button sits in the admin bar at the top, usually as Purge All or Clear All Cache
- There are six layers: browser, plugin, builder CSS, host, CDN and object cache; each layer has its own button
- Eleven plugins tested by us on WordPress 7.0.2, with screenshot and WP-CLI command
- Then check in a private window and with the response headers, not only in your own browser
First: which cache do you mean?
| Layer | What it holds | Where you clear it |
|---|---|---|
| Browser cache | Files on the visitor's device | Hard refresh: Ctrl+Shift+R (Windows) or Cmd+Shift+R (Mac), or a private window |
| Your plugin's page cache | Ready-made HTML of your pages | Button in the admin bar or on the plugin page, see below |
| CSS/JS and builder cache | Minified files and the CSS of Elementor, Breakdance or Divi | In the optimization plugin or in the builder itself |
| Your host's server cache | Copies on the server, before WordPress starts (Varnish, LiteSpeed, Nginx) | In the hosting panel, sometimes also via a button in WordPress |
| CDN | Copies on servers worldwide | In the CDN dashboard (Cloudflare, Bunny, your host's CDN) |
| Object cache | Database data in Redis, Memcached or similar | wp cache flush or the button of your object cache plugin |
Overview: the button per cache plugin
| Plugin (tested) | Admin bar button | WP-CLI (tested) |
|---|---|---|
| LiteSpeed Cache 7.9.1 | Purge All | wp litespeed-purge all(LiteSpeed only) |
| W3 Total Cache 2.10.7 | Performance, Purge All Caches | wp w3-total-cache flush all |
| WP Super Cache 3.1.4 | Delete Cache | Not built in |
| WP Fastest Cache 1.5.3 | Clear All Cache | wp fastest-cache clear all |
| WP-Optimize 4.7.0 | Purge cache for all pages | Not built in |
| Breeze 2.6.2 | Purge All Cache | wp breeze purge --cache=all |
| Speed Optimizer (SiteGround) 7.8.4 | Purge SG Cache | wp sg purge |
| Hummingbird 3.21.2 | Clear all cache | Not built in |
| Cache Enabler 1.8.17 | Clear Site Cache | wp cache-enabler clear |
| Super Page Cache 5.3.7 | Purge whole cache | wp cfcache purge_cache |
| Autoptimize 3.1.16 | Clear CSS/ JS Cache | wp autoptimize clear |
Tested by SparkCore on a clean test install of WordPress 7.0.2, 16 October 2026. Every plugin installed separately from wordpress.org and activated on its own; the red outline on the screenshots is ours.
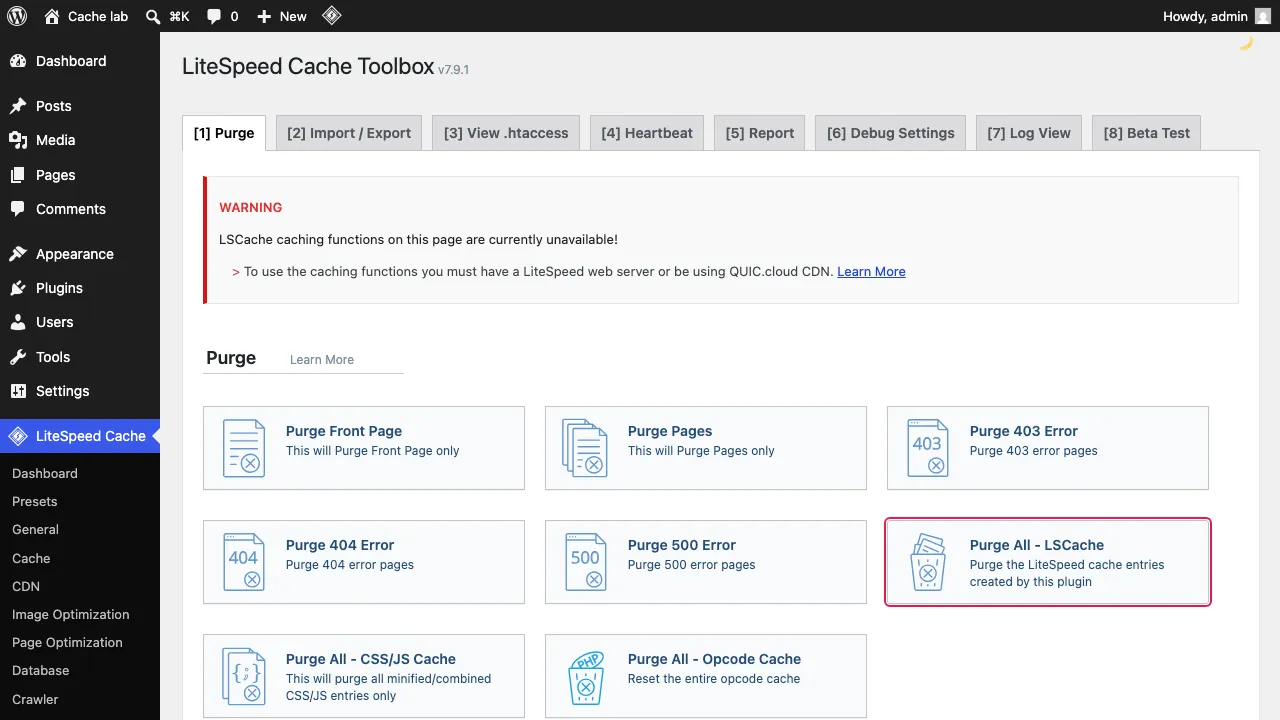
Clear the LiteSpeed Cache
- Hover over the LiteSpeed icon in the admin bar
- Click Purge All
- Or: LiteSpeed Cache, Toolbox, Purge tab, Purge All - LSCache
WP-CLI: wp litespeed-purge all. Exists, but returned an error on our test server without LiteSpeed (Got 400): the command sends the purge to the LiteSpeed server. Hostinger lists the same command in its own guide.

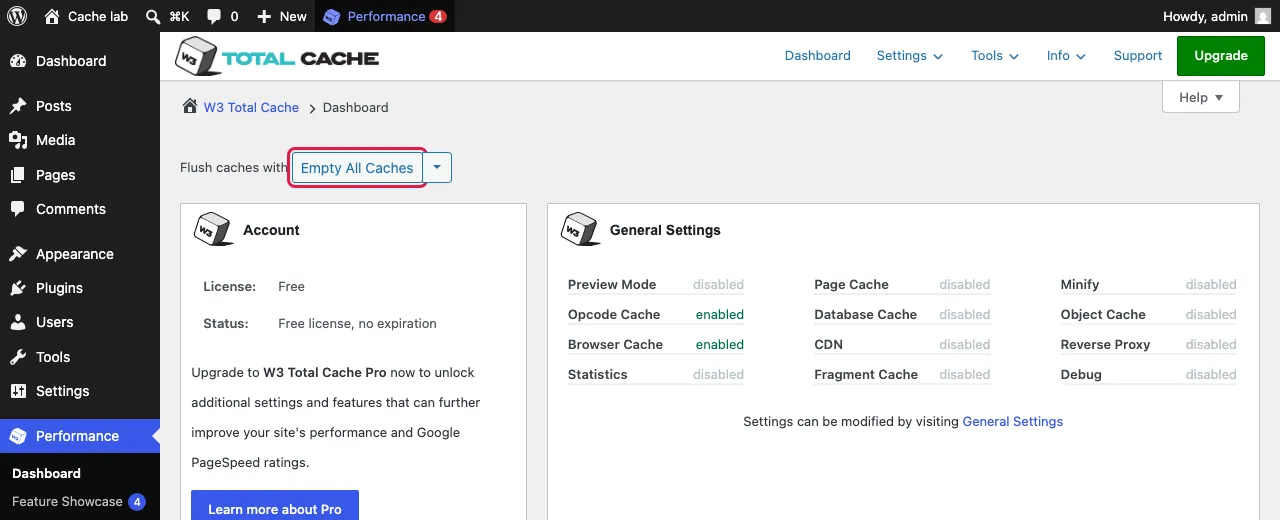
Clear W3 Total Cache
- Hover over Performance in the admin bar
- Click Purge All Caches
- Or: Performance, Dashboard, Empty All Caches
WP-CLI: wp w3-total-cache flush all. Worked in our lab: "Everything flushed successfully."

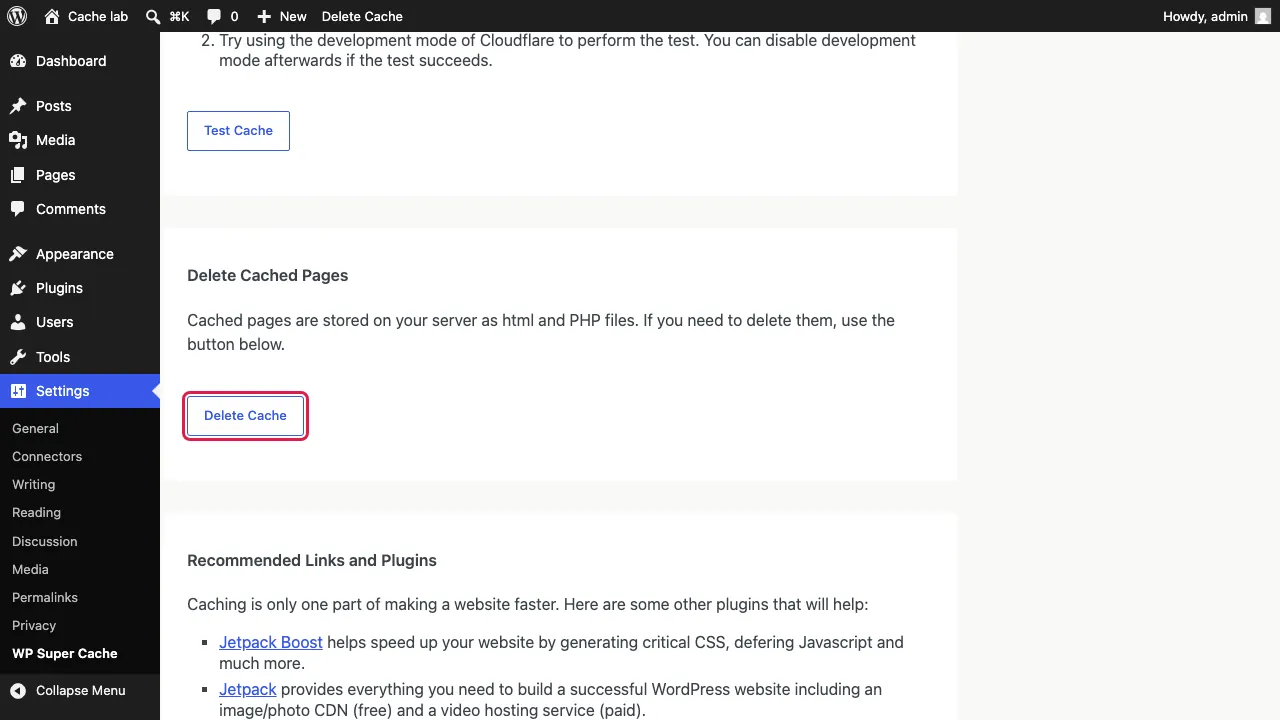
Clear WP Super Cache
- Click Delete Cache in the admin bar
- Or: Settings, WP Super Cache, Easy tab, Delete Cache
WP-CLI: No built-in WP-CLI command: in our lab wp super-cache did not exist. That needs a separate WP-CLI package.

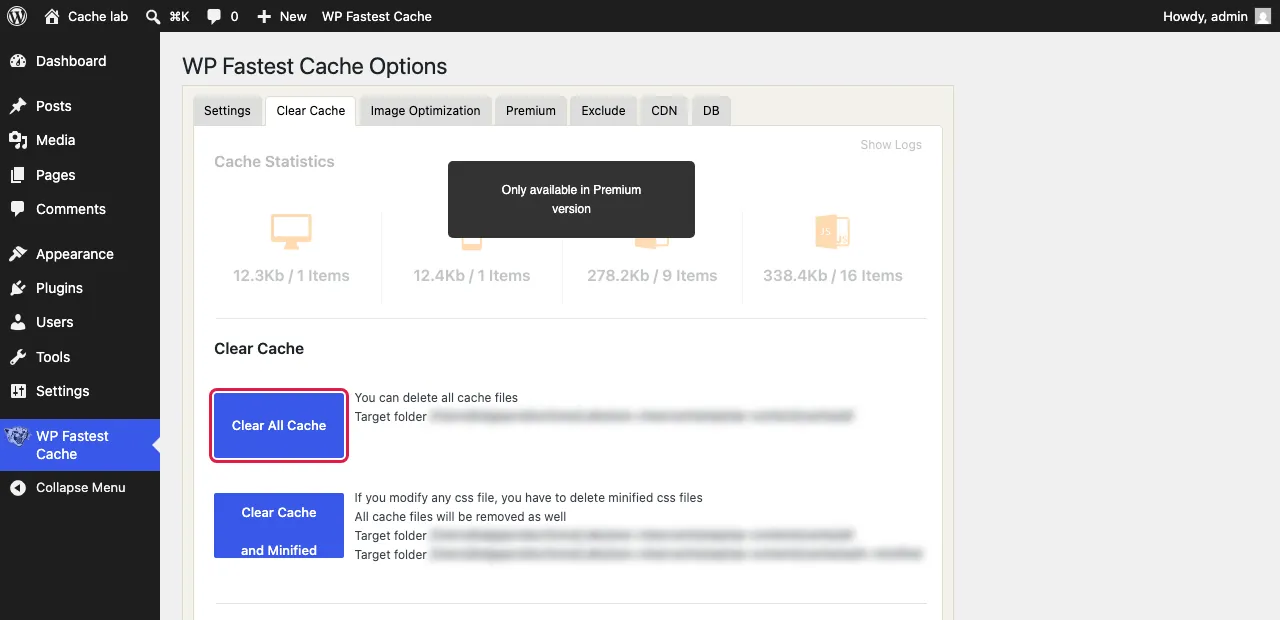
Clear WP Fastest Cache
- Hover over WP Fastest Cache in the admin bar
- Click Clear All Cache
- Or: WP Fastest Cache, Clear Cache tab, Clear All Cache
WP-CLI: wp fastest-cache clear all. Worked in our lab: "The cache has been cleared!"

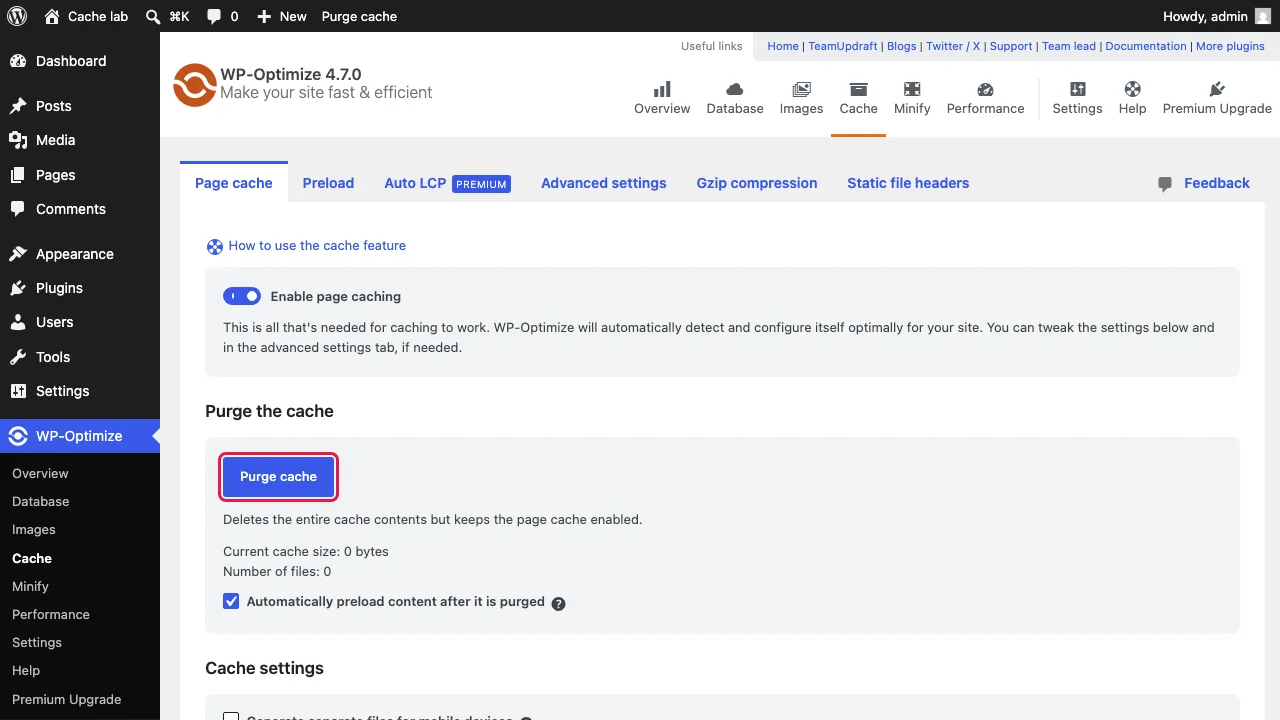
Clear the WP-Optimize cache
- Go to WP-Optimize, Cache, Page cache tab
- Click Purge cache
WP-CLI: We found no WP-CLI command in the free version; WP-Optimize itself lists WP-CLI as a Premium feature.
Clear the Breeze cache (Cloudways)
- Hover over Breeze in the admin bar
- Click Purge All Cache
WP-CLI: wp breeze purge --cache=all. Worked in our lab: "Breeze all cache has been purged."

Clear SiteGround Speed Optimizer
- Click Purge SG Cache in the admin bar
WP-CLI: wp sg purge. Worked in our lab for the assets folder, with a warning that the file cache was off. On SiteGround it empties the Dynamic Cache.

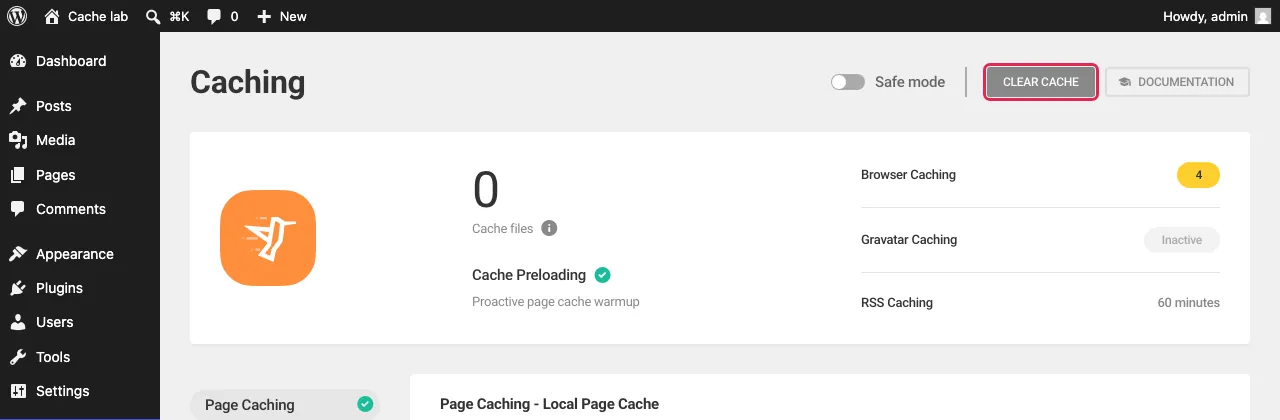
Clear the Hummingbird cache
- Go to Hummingbird, Caching
- Click Clear cache at the top right
WP-CLI: We found no WP-CLI command in the free version.
Clear Cache Enabler
- Click Clear Site Cache on the right of the admin bar
WP-CLI: wp cache-enabler clear. Worked in our lab: "Site cache cleared."

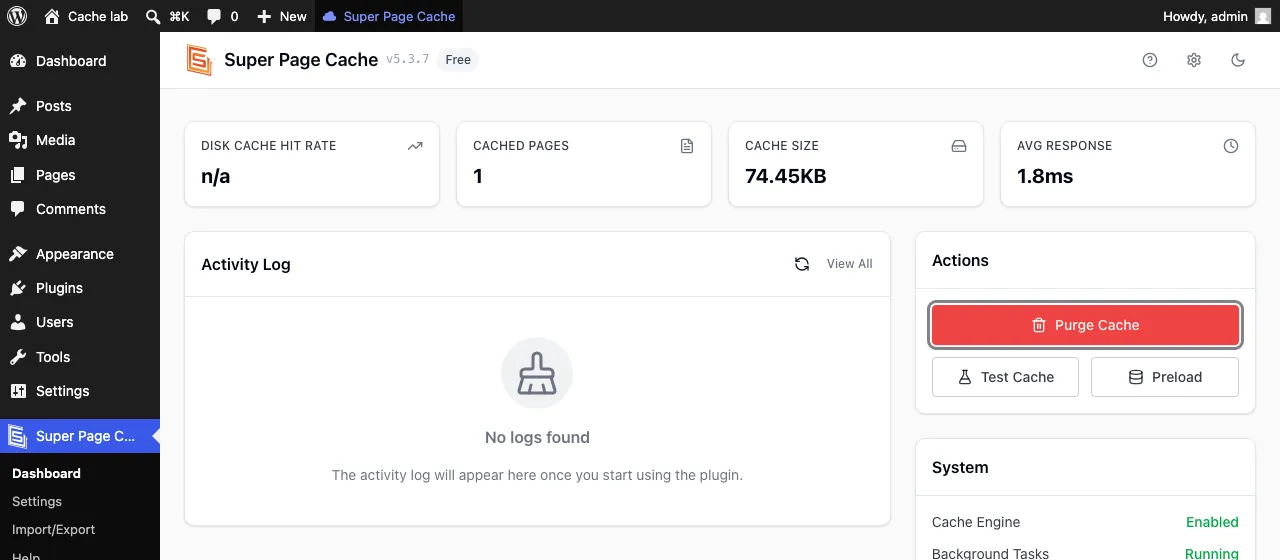
Clear Super Page Cache
- Hover over Super Page Cache in the admin bar
- Click Purge whole cache
WP-CLI: wp cfcache purge_cache. Worked in our lab: "Cache purged successfully."

Clear the Autoptimize cache
- Hover over Autoptimize in the admin bar
- Click Clear CSS/ JS Cache
WP-CLI: wp autoptimize clear. Worked in our lab: "Cache flushed."

Clear WP Rocket and Spark Speed
- WP Rocket: admin bar, WP Rocket, Clear and preload cache, or Settings, WP Rocket, Dashboard tab, the same button. A single page is cleared with Clear this cache in the page list. WP-CLI
wp rocket clean --confirmneeds the separate WP Rocket CLI package (source, WP-CLI). - Spark Speed: admin bar, Spark, clear everything and rebuild, or on the front end clear this page's cache. In the dashboard: Cache tab, Rebuild cache. The object cache has its own button, Clear object cache. WP-CLI:
wp spark-speed purgeandwp spark-speed flush-object-cache(documentation).
Builder cache: Elementor, Breakdance and Divi
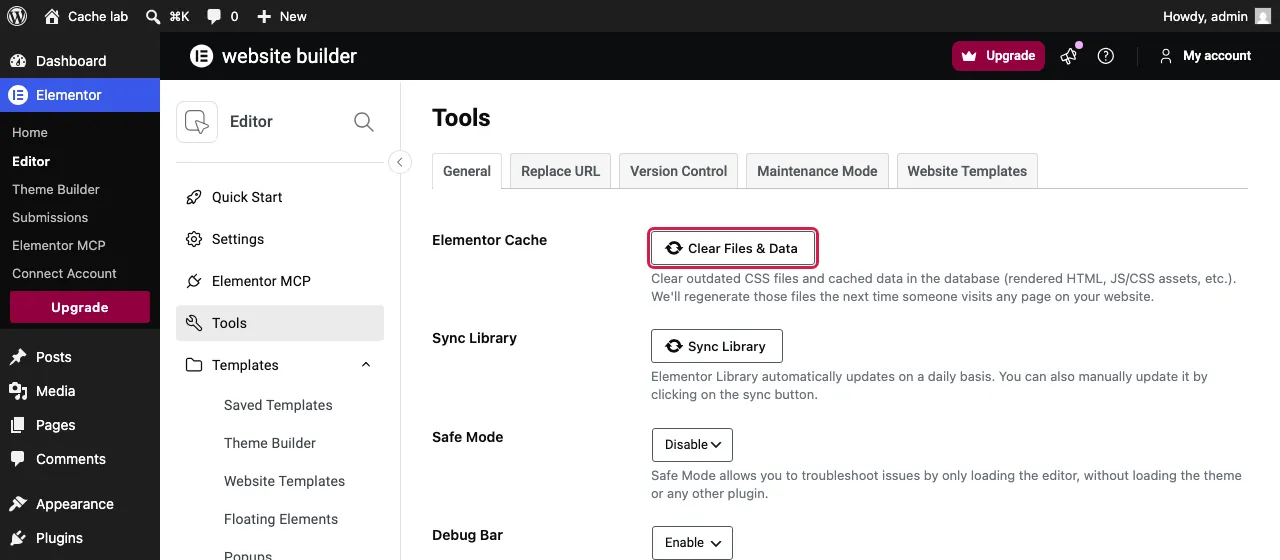
- Elementor 4.3.5: Elementor, Tools, General tab, Clear Files & Data (Regenerate Files & Data in older versions). WP-CLI
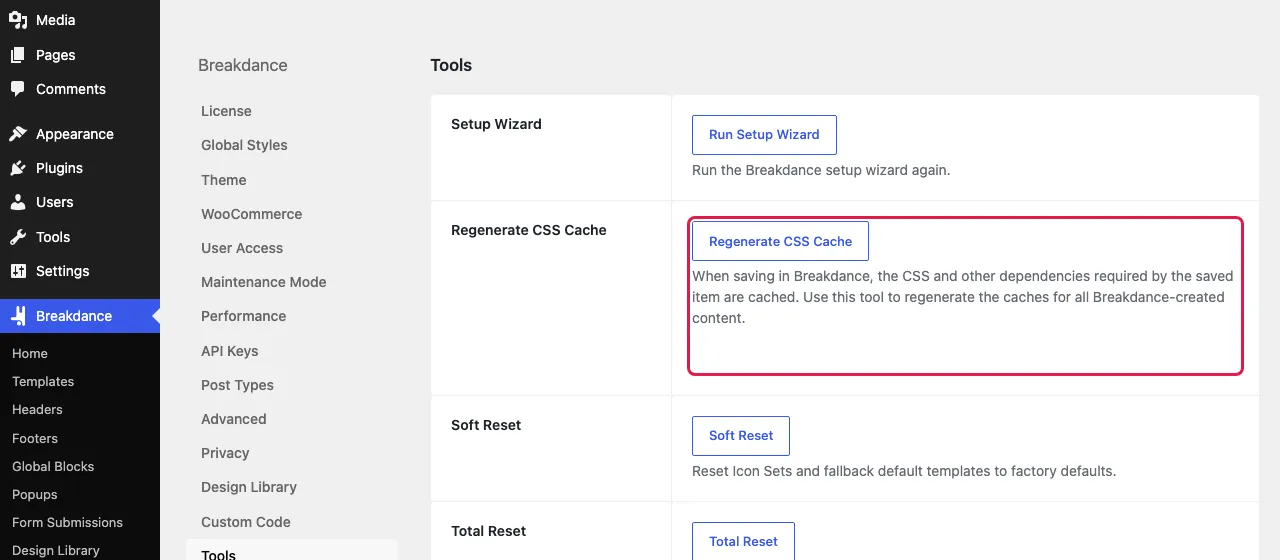
wp elementor flush-cssworked in our lab. - Breakdance: Breakdance, Settings, Tools, Regenerate CSS Cache.
- Divi 5: Divi, Theme Options, Clear CSS Cache button at the top right (Elegant Themes, updated 8 Jul 2026; we did not test Divi ourselves).
Per host: Hostinger, SiteGround, Kinsta, WP Engine, Cloudways and Cloudflare
| Host | How to clear the cache | Source (official documentation) |
|---|---|---|
| Hostinger | hPanel: Websites, your site's Dashboard, WordPress, Overview, Core card, Flush Cache. CDN separately: Performance, CDN, Flush cache. With LiteSpeed Cache also via Purge All in WordPress. | updated 15 Sep 2026 updated 24 Jul 2026 |
| SiteGround | Site Tools: Speed, Caching, Dynamic Cache tab, Flush Cache icon next to the URL. Memcached separately on the Memcached tab (for all sites at once). | updated 28 Nov 2025 |
| Kinsta | MyKinsta: Sites, your site, Caching, Server Caching, Clear cache (also edge and Redis cache, not the CDN). CDN: Caching, CDN, Clear CDN cache. In WordPress: Clear Cache in the admin bar. WP-CLI: wp kinsta cache purge --all. At most once every 10 seconds. | updated 3 Jun 2026 |
| WP Engine | User Portal: Sites, your environment, Cache (sometimes under Manage), Clear all caches. In WordPress: WP Engine, Caching, Clear All Caches (does not empty the object cache). | updated 30 Sep 2026 |
| Cloudways | In WordPress: Settings, Breeze, Varnish tab, Purge Varnish Cache. At server level: Servers, your server, Manage Services, purge Varnish. | Breeze and Varnish Manage Services, 20 Jan 2026 |
| Cloudflare | Dashboard: Configuration page, under Purge Cache, Purge Everything and confirm. Cloudflare itself recommends purging by URL where possible: purging everything causes a spike of requests to your server. | updated 29 Sep 2026 |
Taken only from each host's own documentation, checked on 16 October 2026. We have no access to these control panels and therefore show no screenshots of them. Menu names change; when in doubt, follow the source.
Check that it worked
- Open the page in a private window where you are not logged in: many plugins do not show logged-in admins a cached page.
- Look at the response headers, for example with
curl -I https://yoursite.com/or the Network tab in your browser. - Cloudflare:
cf-cache-statusis MISS right after purging and HIT again afterwards. - Varnish and many CDNs: the
ageheader starts again at 0 after purging. - LiteSpeed:
x-litespeed-cacheshows miss or hit; Spark Speed:x-spark-speed-cache.